By popular demand … here’s the cake recipe which has been a staple food of mine for years. In nearly 15 years of experience with the Specific Carbohydrate Diet (SCD) and constant experimentation with gourmet gluten-free recipes, including muffins with kefir as a key ingredient, I’ve found that nothing comes close to this proven recipe.
When I was a kid, my dad learned about the SCD diet in the central newspaper. 5-6 months later, the Wheaties I’d been so enjoying as a toddler had suddenly triggered a severe allergic reaction. My parents rushed me to the walk-in clinic, where the doc concluded: “I suggest you test Alexander for gluten and wheat allergies.”
Suddenly, a 💡 went off in Dad’s head! He was reminded of his SCD discovery from half a year earlier. Right there and then, his discovery became the happiest accident of our lives.
And that was the moment my parents decided to grab a copy of Breaking the Vicious Cycle and put me on the Specific Carbohydrate Diet hard-core.
It’s much stricter than a normal gluten-free diet, but since I got on it at an impressionable young age — 6-7 years old, to be exact — it’s been easy to adapt to. I can directly attribute much of my health today to this complete, unbridled, prolonged immersion in healthy eating, and especially how early it happened in my life.
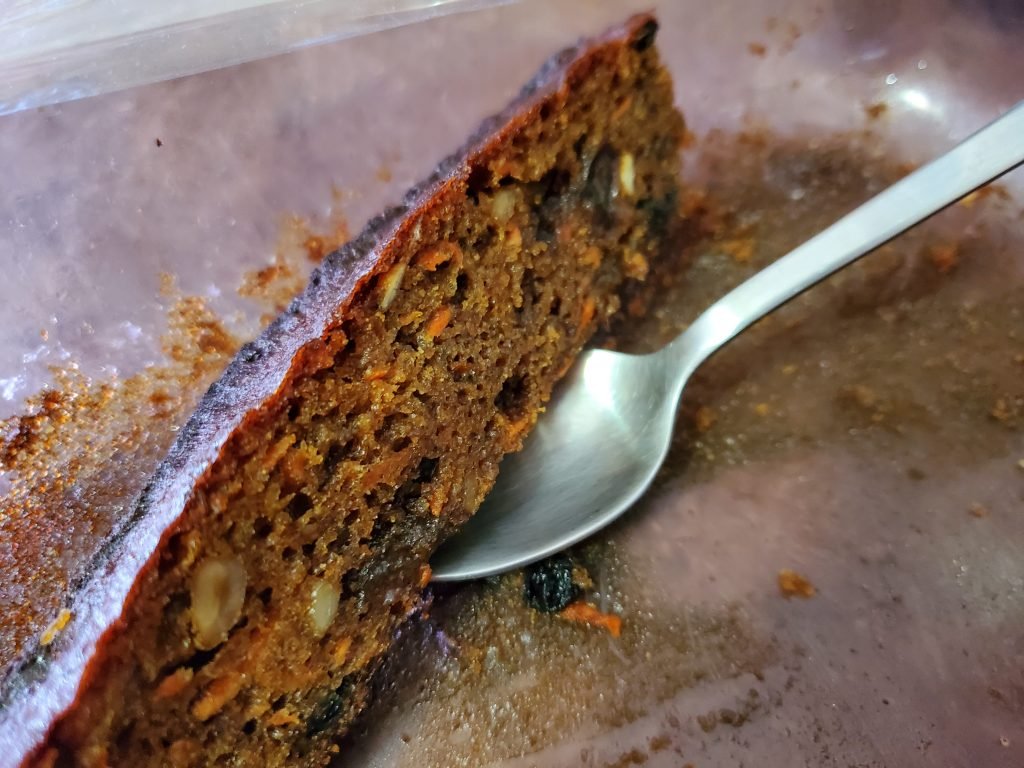
This totally SCD-legal cake recipe is all about nuts & veggies, and gives you all the goodness of gourmet foods without the digestive worries of grain-based products.
Enjoy & savour it, as have myself, my family and my close friends.
Cake Ingredients
Essentials
- 6 large eggs
- 7-8 tbsp honey
- DO NOT USE RAW HONEY. It’ll be a waste. The cake is heated to 350°F. Temperatures that hot will remove EVERYTHING that makes raw honey raw. I recommend using average, off-the-shelf grocery store honey — in Canada, for example, Billy Bee & Aurora brands and similar.
- When I want to make the cake sweeter, I tend to put 11 – 13 tablespoons. As a starting point, I recommend doing 7-8 tablespoons first, and then experiment to vary the sweetness as you see fit.
- 4 tbsp coconut oil
- We use ONLY 100% virgin coconut oil. I don’t understand why you’d not want to experience that nice taste & smell of pure, unadulterated coconut oil. Maybe it’s just me — but I will never buy any non-100%-virgin coconut oils again. I think they suck! They taste artificial and … well … tasteless.
- 2 tsp baking soda
- 1-1.5 tsp sea salt
- I only use sea salt, so this recipe is best prepared using sea salt. Some types of salt (I.e. iodized and other kinds of table salt) can be saltier than others; your mileage may vary.
- 1 lbs. (3 cups) FINE almond flour
- The flour MUST be fine enough to help the cake to rise. For the past 5 years, I’ve been buying almond flour from Nuts.com*. Out of 3 suppliers I’ve used, Nuts.com is the absolute BEST for fine flour in every way — delivery, price and quality.
- From our experience, Bob’s Red Mill flour just didn’t cut it … but whether they’re good or bad 15 years later, who knows? We only used them in the beginning, because in the 2005-2006 market, when my parents had just introduced me to the SCD diet, there was no other choice.
- 2-3 cups grated carrots and/or beets.
- How much I put depends on the actual size of the vegetables. I like to experiment by varying the amount of grated vegetables from batter to batter, and I recommend you do the same, using the stated amount as a starting point.
- Where carrots & beets are not available, you can use apples as a substitute — preferably Granny Smiths. Mix & match however you like and see what happens.
Toppings
Any combination of the following:
- Pepitas & sunflower seeds
- Raisins and/or dried currants
- Sliced organic apricots (the dark, brown-ish ones WITHOUT sulfites — these ones taste the best! They do taste like REAL apricots, just as Mother Nature made them.)
- Anywhere from 1 tsp-2 tbsp poppy seeds
- Cayenne pepper and cinnamon to taste.
Whichever I include depends on availability of the ingredients. As a bare minimum, I always include at least 1 tbsp pepitas, 1 tbsp sunflower seeds, and 3 tbsp of raisins.
Cake Preparation
To give you an idea of the dimensions — I bake the cake in a 3-quart Pyrex pan, 13″ x 9″ x 2″.
- Smear the pan with some coconut oil. This ensures cake pieces can be easily lifted up without sticking or burning up.
- OPTIONAL (but recommended): Stick the smeared pan in the oven, turn on the oven light, and leave it like that for at least 30 minutes. The light’s heat creates a reeeeeeeally nice “Easy-Bake effect,” liquifying the coconut oil to make things easier when it comes time to actually bake the cake. Not bad for 140-year-old technology! I do that usually while making the batter. Hey batter batter, hey batter batter. 👇👇👇
- Place all essential ingredients (and toppings of choice) in a pot to mix. I mix the batter with a Kitchenaid electric stand mixer (a true buy-it-for-life or “BIFL” appliance from the 90’s, made in the USA and strong as ever) to ensure consistency. At the lowest setting, it takes 5 minutes. Sometimes, we bump it up to 2x speed for a few minutes to make things even more efficient. Hell, you can do ANYTHING with a Kitchenaid — it’s an indispensable tool in anyone’s home!
- Pour the batter into the tray.
- PRO TIP: Usually, we bake immediately after mixing. However, we sometimes leave the batter in the pan for several hours to soak up some of the solids — especially when we put poppy seeds and/or apricots, because as they absorb liquids, they take on a VERY nice texture. You can accelerate this with the same nifty “Easy-Bake trick”: leave the pan w/complete batter in the oven, with the oven light on, and the resulting heat keeps the coconut oil in a liquid state.
Baking
We typically bake the cake in a convection oven. When we’re on the road, not everybody we visit has a convection oven, so we sometimes take a Moulinex countertop convection oven. Another great “BIFL” appliance and a family gift, the Moulinex oven is more than 20 years old, made in France, and built to last. It has aged very well and bakes just like yesterday. To be safe … every oven we use is checked using an infrared temperature gun for the sake of troubleshooting. 😉
These instructions apply to a convection oven; of course, your mileage may vary. And yes – we do use conventional oven. On the most part it does work, but … I prefer convection.
- Preheat oven to 350°F
- Bake cake for 34-35 minutes or until golden brown.
- After 34-35 minutes, TURN OFF THE OVEN and leave cake in oven for 5-10 minutes before removing.
- Once you’ve removed the finished product and let it cool down, use a spatula to lift the edges all around the cake as well as underneath it. This makes it easier to slice and serve pieces without any sticking — that is, if it even sticks at all, thanks to the coconut oil smeared on the pan in advance.
Slice, serve, enjoy and let us know how did it work out for you. We’d be excited to hear from you!
Every next time you bake, feel free to experiment with the options of your choice — fruit, veggies, spices, toppings, honey-to-salt ratio, it’s all up to you and whatever you prefer.
We’d love to hear from you about your experience, especially how you’ve baked the cake, and your experimentation with ingredients. Please leave your feedback in the comments below!
P.S. We have just made a test bake off with tuna (two tins drained of oil), spices, no honey, but with raisins and currents, carrots & beets, and it was a hit. Two cakes: sweet and tuna survived for 3 days only 😍
P.P.S. The best part is there’s no need to refrigerate the cake. It’s non-perishable! You have to abuse it to make it otherwise. We’ve taken it with us on the plane and on the road. When traveling, we keep it in containers or zippered bags. When traveling for 4 or 5 days and longer, then we’d use a refrigerator to keep them safe.
Once we forgot small zippered bag in our luggage, returned from trip and found it upon arrival. DUH. And only then we noticed signs of mold. After 8 or 9 days! So it is safe to keep it for least 5 days without refrigeration. We travel 7-11 times a year on average.
😋 Bon Appétit,
Alexander Vee
*DISCLAIMER: We have no affiliation with Nuts.com, and we are not being paid to recommend their product. We’re simply making a sincere, up-to-date recommendation from real experience. We purchase from Nuts.com 2-3 times a year, 25 lbs. of almond flour each time. And we’ve used them for close to 5 years, maybe more.
Heck — were we in an affiliate agreement with Nuts.com, and were they to pay us a commission, it would NOT change our opinion one iota!

Alex is The Gluten Free Guy — “Marketer By Day, Baker By Night!” Gluten-free’s been his way of life since 2006.